Postcard Tutorial
After a year of blog silence I am ready to do some tutorials and demos of sewing not to mention resurrecting the 368 blocks project.


First up, a fun little quilted postcard tutorial. This is part of the Instagram #quiltnon2017 weekend with @intrepidthreads. Make a postcard and post it to Instagram by 3pm EST on Sunday 2/26/2017 with the hashtags #quiltnon2017 and #quiltnon2017postcard and you may be eligible for a prize!

Basically a quilted postcard is a mini mini quilt lots of people get to touch as it journeys from one home to another via our postal system. I find them particularly charming and full of possibilities. I have made custom orders for people to use these as greetings, invitations and business thank you notes. Even when done as a group they are all quite individual. I have never had someone not get a smile from receiving a thought in the mail via a fiber postcard.
They are just as fun to make. A great opportunity to test a new technique, play with some free motion quilting, put together fabrics and colors you normally wouldn't think would work. Postcards can be made one at a time or in batches. The methods are similar but can have wildly different results.
First, let's talk what makes a postcard according to the United States Postal Service.
I work with the following criteria - I make my cards 4" by 6". I use a first class letter stamp. This covers postcard postage and handling as some of the USPS offices will not run the card through the sorting machines. If mailing internationally I follow International cost for a first class letter. I have never had a postcard returned or arrive due to low postage this way. I have sent and received postcards from the USA, Canada and Australia.
For these postcards I took my 'scene' inspiration from the really fun and quirky applique projects in the book "Scandinavian Stitches" by Kaysa Wikman. I really enjoyed this style of art in applique. It is also an excellent way to play with free motion quilting - there is no need to be precise!
Here I have prepped my scraps of fabric with the fishy shapes outlines from the patterns provided in "Scandinavian Stitches" for my single postcard.

Back ground fabric prepared for the single postcard.

Single postcard fused to the background and the batting and ready for some stitching.
Background for 4 postcard batch ready for applique pieces.


Once you have your scene set using whatever method you chose, it is time for some quilting. You will quilt the scene side of your postcard/s to the batting only - do not add the back where the mailing information and greeting will go at this stage.

Aren't they adorable!? I just love the sketch style of the scandinavian style Kajsa Wikman teaches. No precision here, just some fun thread sketching with my sewing machine and some FMQ!

Here I did the edge of the applique in a dark grey to blend a bit more and then added the thread sketched 'gone fishing'. I did not freehand those words - my cursive isn't that nice without a sewing machine, much less with one. I drew the words on the background with frixion ink - and had to iron it away and redo it several times.

here you can see the batting side with the stitching showing for the fish and writing. I had some tension issues at one point - just fix it and keep goin!


At this point I have prepped my backing fabric. I used a white on cream print. You want a fabric you can write on and it will be seen - so white or off white. If you use a white printed fabric it is easier to write on. The white ink used for white on white and white on cream prints is like a paint and it makes a smoother surface for writing.
I cut my backing fabric 3/4" larger than the finished postcard/s and using a glue stick affixed it to the back of my art. You do not need a lot of glue, but enough to prevent slipping during the edge finishing. I do not like to pin my backing to postcards. I do not want holes to make writing problematic later.

Then comes the scary part - Trimming! For the single postcard I will trim to 4" by 6".

For the postcard set I first trim to 8" by 12". Then I cut that block into 4 equal postcards sized 4" by 6". This is when I invariably start smiling big - my big scene now tells 4 unique stories!

Now to decide on edge treatment. There are many ways to do this. Basically you want your postcard edges to survive with trip from many hands, machines, and the occasional floor. however, that only requires set edges. You could just sew a straight stitch close to the edge. Many people use a zig zag or satin stitch.
My favorite method is an overlock stitch of any kind. When doing a lot of postcards I will use my serger along the edges. For just a few I use my domestic machine and whatever overlock stitch I have available. For 1 fish 2 fish I used stitch 29 on my brother machine in a light grey aurifil thread. i always stitch over an inch or so to secure both ends. By finishing the edge this way you get the whole 'canvas' size of the postcard.

For the group of 4 I decided to do a binding.

Here we see the wee binding strips. I used a double fold binding, just like I would for any quilt. I cut 1.25" strips ironed in 1/2, and then sewed the raw edge about 3/16" from the edge of the postcard on the art side.

Then I turned on Trolls the movie and started hand sewing the binding to the back.

Right about now I was questioning my dedication.

But, the end result is worth it. Very cute and unique stories to send off to a few friends.
Once I have the edges finished I use a stiffener, like Aleene's Stiffen Quik on the back. Following the directions I let it dry, then iron it flat. This gives me the best surface for writing and stamping on fabric with my pen of choice. I use micron pens or a fine tip sharpie for the writing and whatever inks I have on hand for the stamping.
A few notes on the back. Postal regulations require the back be used on the horizontal, with the address on the right, the stamp on the upper right, and leaving about 3/8" of the bottom for the postal bar code sticker. The return address should be in the upper left.
At one time USPS required the top have the word postcard and a line down the middle of the card separating the address from the salutation. That no longer is the case - But I prefer to use those guidelines anyway.
You can print postcard backs of all kinds from free sources online. You can use stamps, or just write it all using a permanent pen. I like to use a fine tip sharpie. Also, sign your work!
Some added ideas - use your foils, angelique fibers, ink stamps. Play with selvedges, character fabrics, and paper ephemera. Print your favorite quotes or just words on fabric and sew them to a fun backing. Make the USPS journey part of your fiber story - just imagine how many smiles your bit of fiber art will inspire along the way.

I hope this was helpful and we see many quilted postcards winging their way to friends, family, and your various quilty crushes. Happy sewing!


A few projects deserving blog time!
First up, a fun little quilted postcard tutorial. This is part of the Instagram #quiltnon2017 weekend with @intrepidthreads. Make a postcard and post it to Instagram by 3pm EST on Sunday 2/26/2017 with the hashtags #quiltnon2017 and #quiltnon2017postcard and you may be eligible for a prize!

Basically a quilted postcard is a mini mini quilt lots of people get to touch as it journeys from one home to another via our postal system. I find them particularly charming and full of possibilities. I have made custom orders for people to use these as greetings, invitations and business thank you notes. Even when done as a group they are all quite individual. I have never had someone not get a smile from receiving a thought in the mail via a fiber postcard.
They are just as fun to make. A great opportunity to test a new technique, play with some free motion quilting, put together fabrics and colors you normally wouldn't think would work. Postcards can be made one at a time or in batches. The methods are similar but can have wildly different results.
First, let's talk what makes a postcard according to the United States Postal Service.
 |
| usps.com FAQ pages |
I work with the following criteria - I make my cards 4" by 6". I use a first class letter stamp. This covers postcard postage and handling as some of the USPS offices will not run the card through the sorting machines. If mailing internationally I follow International cost for a first class letter. I have never had a postcard returned or arrive due to low postage this way. I have sent and received postcards from the USA, Canada and Australia.
I also no longer use embellishments that stick out from the body of the art. I sent a postcard once with a ton of bead work that made the picture elegant and make some sense - and it arrived with a bunch of frayed thread and no beading. Still pretty and the recipient thought it was gorgeous. I was disappointed and could only imagine the beads languishing on the cement floor of a random USPS sorting center.
I will use raw edge applique, mixed media, and almost any fiber technique. As long as it is sewn in place by machine. I am not worried about it getting washed or dirty - if it happens that means the journey got REALLY interesting!
I will use raw edge applique, mixed media, and almost any fiber technique. As long as it is sewn in place by machine. I am not worried about it getting washed or dirty - if it happens that means the journey got REALLY interesting!
 |
| A few quilted postcards I have recieved in my personal collection. |
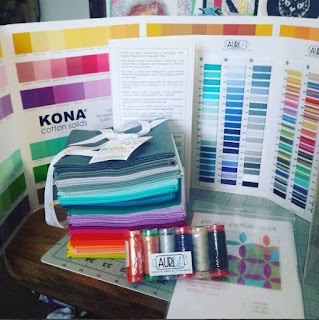
With the finished size in mind I start collecting materials and thinking of the theme I want to work with. This is a great time to dig into your scraps; I almost always use a handful from the scrap basket.
 |
| Written by Kajsa Wikman @sykokajsa |
 |
| Honest craft table. The coffee is a premium ingredient when creating! |
I start with a base fabric 3/4" larger than my finished project. Scraps of fabric for whatever scene or additions being made. Fusible batting also 3/4" larger than the finished product. If you do not have fusible any batting will do. Notions include; glue stick, heat and bond (or fusible of your choice), pins, clips, ruler rotary cutter and mat, erasable pen (I used frixion), spray starch and stiffener. We will talk backing later on in the process.
Below you will find the process photographed for both a single postcard and a set of 4. The preparation is the same for both. For the larger set I make a backing and batting 3/4" larger than the 4 finished postcards; in this case 4 finished is 8" by 12" so I cut my background and batting to 8.75" by 12.75".
 |
| 1 fish 2 fish... |

Back ground fabric prepared for the single postcard.

Single postcard fused to the background and the batting and ready for some stitching.
 |
| Landscape or character fabrics with large prints like Enchanted from Fibs and Fables by Anna Maria Horner make great postcard stories. |


Once you have your scene set using whatever method you chose, it is time for some quilting. You will quilt the scene side of your postcard/s to the batting only - do not add the back where the mailing information and greeting will go at this stage.

Aren't they adorable!? I just love the sketch style of the scandinavian style Kajsa Wikman teaches. No precision here, just some fun thread sketching with my sewing machine and some FMQ!

Here I did the edge of the applique in a dark grey to blend a bit more and then added the thread sketched 'gone fishing'. I did not freehand those words - my cursive isn't that nice without a sewing machine, much less with one. I drew the words on the background with frixion ink - and had to iron it away and redo it several times.

here you can see the batting side with the stitching showing for the fish and writing. I had some tension issues at one point - just fix it and keep goin!


At this point I have prepped my backing fabric. I used a white on cream print. You want a fabric you can write on and it will be seen - so white or off white. If you use a white printed fabric it is easier to write on. The white ink used for white on white and white on cream prints is like a paint and it makes a smoother surface for writing.
I cut my backing fabric 3/4" larger than the finished postcard/s and using a glue stick affixed it to the back of my art. You do not need a lot of glue, but enough to prevent slipping during the edge finishing. I do not like to pin my backing to postcards. I do not want holes to make writing problematic later.

Then comes the scary part - Trimming! For the single postcard I will trim to 4" by 6".

For the postcard set I first trim to 8" by 12". Then I cut that block into 4 equal postcards sized 4" by 6". This is when I invariably start smiling big - my big scene now tells 4 unique stories!

Now to decide on edge treatment. There are many ways to do this. Basically you want your postcard edges to survive with trip from many hands, machines, and the occasional floor. however, that only requires set edges. You could just sew a straight stitch close to the edge. Many people use a zig zag or satin stitch.
My favorite method is an overlock stitch of any kind. When doing a lot of postcards I will use my serger along the edges. For just a few I use my domestic machine and whatever overlock stitch I have available. For 1 fish 2 fish I used stitch 29 on my brother machine in a light grey aurifil thread. i always stitch over an inch or so to secure both ends. By finishing the edge this way you get the whole 'canvas' size of the postcard.

For the group of 4 I decided to do a binding.

Here we see the wee binding strips. I used a double fold binding, just like I would for any quilt. I cut 1.25" strips ironed in 1/2, and then sewed the raw edge about 3/16" from the edge of the postcard on the art side.


Right about now I was questioning my dedication.

But, the end result is worth it. Very cute and unique stories to send off to a few friends.
Once I have the edges finished I use a stiffener, like Aleene's Stiffen Quik on the back. Following the directions I let it dry, then iron it flat. This gives me the best surface for writing and stamping on fabric with my pen of choice. I use micron pens or a fine tip sharpie for the writing and whatever inks I have on hand for the stamping.
A few notes on the back. Postal regulations require the back be used on the horizontal, with the address on the right, the stamp on the upper right, and leaving about 3/8" of the bottom for the postal bar code sticker. The return address should be in the upper left.
 |
| Great visual from ez-ink.com |
At one time USPS required the top have the word postcard and a line down the middle of the card separating the address from the salutation. That no longer is the case - But I prefer to use those guidelines anyway.
 |
| A few postcard backs I made recently from various free for use graphics. |
You can print postcard backs of all kinds from free sources online. You can use stamps, or just write it all using a permanent pen. I like to use a fine tip sharpie. Also, sign your work!
Some added ideas - use your foils, angelique fibers, ink stamps. Play with selvedges, character fabrics, and paper ephemera. Print your favorite quotes or just words on fabric and sew them to a fun backing. Make the USPS journey part of your fiber story - just imagine how many smiles your bit of fiber art will inspire along the way.

I hope this was helpful and we see many quilted postcards winging their way to friends, family, and your various quilty crushes. Happy sewing!

This is a great tutorial. Thanks! Does the adhesive for self-stick stamps adhere to the fabric or do you have to use tape over it?
ReplyDeleteJane - It sticks just fine, all my received postcards still have their stamps. the adhesive they use is amazing! Also, if you put tape over a stamp the USPS will not accept it as valid postage. I have been tempted to sew them just to see - but not willing to risk it, lol.
DeleteThanks for reading!