Indigo's Sew Many Colors Mini
I have been a busy little bee with the promise of spring in the air. Lots of projects to share, some teaching moments and some big learning opportunities for myself!
Last month I was super excited to win a care package from #aurifilthreads which included some fabu aurifil threads in various weights, a Whole Circle Studio pattern, color cards of aurifil threads and Robert Kaufman's Kona Cotton line, and a fat quarter pack of kona cotton solids. Some of my favorite things!

At the same time aurifil announced a free pattern and opportunity in the #wholecirclestudios #sewmanycolors pattern.
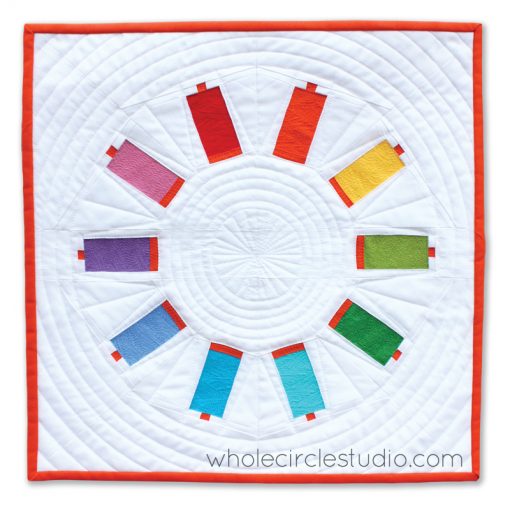 |
| Sew Many Colors of Aurifil! |
Because I had this awesome Kona Cotton set to add to my growing Kona Solids stash, and I do adore aurifil, it seemed a fun project. However with many spring projects I was not sure I would get it done in time for the contest. Then - cold and flu season struck. I have been out this week with a nasty cold. As I did not want to work any complicated projects while heavily medicated and sleep deprived (nyquil TOTALLY counts as heavily medicated!) I thought this would be a great item to work on without worry.
This reasoning will bite me in the hiney later.
For my thread colors to showcase I chose the following;
2564 - Pale Lilac
1246 - Dark Grey
2600 - Dove
4020 - Fuchsia
2245 - Red Orange
1104 - Neon Orange
2120 - Canary
1231 - Spring Green
5007 - Light Grey Blue
2810 - Turquoise
I also knew I didn't want one color for the background. Ultimately I decided on an off white and three shades of grey. All thread colors I use a LOT in quilting!
 |
| First section down. |
 |
| Three sections pieced. Starting to think about how to join these. |
 |
| Four sections made and joined. |
I also debated using thread colors for quilting from the thread spools I chose to represent. I have all those colors and more, and it would have been lovely to use the orange, turquoise, green or blue, etc. However I decided one thread color would tie it all together. I used 2600 dove, my go to thread for piecing and for quilting when I want the thread to blend all the fabrics together. Due to the shades in the background this also showcases how the dove color changes based on the background. On the off white it looks almost blue. On the dark grey it looks white. On the medium grey it nearly disappears.
 |
| Getting quilting help from Leah Day videos! |
 |
| Quilting progress! Some of the pictures of the backing I changed to monochrome greyscale so the orange did not blind me. |
I used the same Kona Tangerine on the backing as the spool colors - mostly because I still had a lot and it was right there... That decision based mostly in lazyness works well, and the quilting shows beautifully.
 |
| Even a mini gets rolled when quilting densely. |
 |
| Yet another motif. |
 |
| Look at that thread! |
 |
| I also used two layers of warm and natural batting which helps the quilting pop. |
 |
| Looking good! You can see some of my thread tension tests in the border I knew would get cut away. |
I found when I measured from the quilted pieces one side was a bit longer than the others. So, I decided to block the top. Rinse in hot water, pin to the desired size, and use a bit of steam to stretch or shrink as needed. It's pretty easy, but a bit time consuming as you have to allow it to totally dry - usually about 24 hours. No biggy, I have the time. My mistake was laying it on a surface that was not totally clean. Ironically I pinned it face down to prevent my iron from transferring or burning the top during the steam portion of this play.
 |
| Pinned face down on my ancient, and apparently dirty, portable ironing block. |
After eating something, calming down, and thinking about options, I decided my best solution to salvage this was to use bleach on the stains. I have done so before and it works great. However it is very difficult to control bleach bleed over, especially with dense quilting. Any liquids travel along the threads like a highway.
As I thought may happen I had a bit of bleach bleed. However this was much easier to fix.
 |
| Here you see some of the bleed on the turquoise and the very edge of the light grey. |
 |
| Here on the backing you can see where the bleach was concentrated. The quilting pulls that liquid right thru from front to back. |
 Several years ago I made a mini and had a similar issue. When I bleached a few iron stains out I had a few of the applique pieces bleach on the edges. It looked terrible. I thought this piece was trashed.
Idea - Bleach all the edges! In this case it worked extremely well - gave the whole design a pebble look that I just loved.
 |
| Totally looks on purpose, right? |
For this one I had to do something different. Pebbled thread spools would not look quite right. I wound up appliqueing a whole new turquoise thread spool to the quilt. Right over the other one. Then I just re-quilted over the applique in the same way. You cannot tell it is not the original without a magnifying glass.
For the edge of light grey - I rubbed some graphite in there to hide the pink from the bleach bleed. I knew art class would come in handy!
 |
| Almost like new. |
So, now to focus on finishing. Added triangles to each corner on the back so it can hang from any direction. Black binding for a nice finished frame.

 |
| Hand sewing while movie watching. |
 |
| And done! Love the texture! |
 |
| Quilting looks fabu on the back, even with the white spots! |


Whew!!! A bit of a journey, but I am so happy with the result!
Please take the time to vote for your top #sewmanycolors mini on the auribuzz blog linked here. Voting open from April 1 to 15. I would love for one of my projects to hang at spring market! I am linky number 16 if you are so inclined.
Happy Sewing!

I love yours! My favorite is how you split the background into four colors. Way to make it unique and standout!
ReplyDeleteThank you so much, I enjoyed making the pattern unique to my aesthetic!
DeleteLOVE the way you segmented the background to make the quilt your own!!
ReplyDeleteThank you oh so much, I really enjoyed coming up with a new way to play with this pattern - then figuring out how to do so!
DeleteSo much work went into this and I learned so much, Thank you for telling us your process about the bleaching.
ReplyDeletethank you so much for reading and you are most welcome! I love using everyday items to work on fibers ;)
Delete