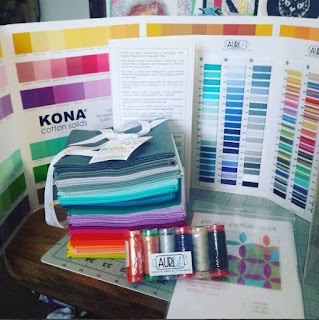
This project is for a local quilt show. For $5 you got a packet of 2 fabrics that had to be used. There was no guideline other than it needed to use those 2 fabrics + any other fabrics you like, and... that's it!
I got this packet in June or July of 2013 and stared at it. It wound up in a pile of fabrics more than once, and then put away, then brought out and stared at some more. Finally in February I pulled it out and put it on top - I wanted to get it done by the time of my March quilt guild meeting.
Then I saw
this blog. OMG!!! Love her work, and she makes equilateral triangles look so easy! That seemed like a good way to work on this challenge! So, i then had to find fabrics to go with the challenge fabrics. Into my stash of blues and yellows. Since the theme was seasons, and I am feeling like I want spring to spring, I pulled out my florals. I decided to deliberately chose some florals I normally wouldn't use in a million years (they have been in my stash for years!). This is a challenge right?
 |
| Sewing triangles in progress - the 6th and 7th triangles on the top row from left to right were the 2 challenge fabrics - bright blue with snowflakes and creamy yellow with a leaf pattern. |
So then, cut the triangles. As I don't have a equilateral triangle tool I used the 60 degree line on my rotary rulers. I wanted a scrappy look so I put the triangles in random places in rows. Lots of sewing, ironing, and figuring out later - I had 8 rows. During this process there was a lot of swearing. I remember - I hate matching points! 2 of the rows didn't match well, so they got set aside. The other 6 will be used. Ok, now to decide what to do with this? Add borders and piece a backing using the discarded rows of triangles. Used invisible thread do a diamond quilting echoing the triangles on the front. The simple quilting holds it all together and you can see the pattern but it also serves to blend the fabrics further together.
 |
| The pieced back |
Right about now is when I decided on birds on a power line. That has long been a favored image of mine - from a distance they seem to hang in the air. You can almost always tell its a bird even though its such an odd shape. How they seem to congregate and be a little community up there in the air.
So how to accomplish this? I know I don't want to applique an opaque fabric for the pole or lines. Once I had my borders on I decided to use a dark navy embroidery thread for thread painting. I also used a layer of navy tulle to fill in the lines between the thread and give it more depth. After thread sketching the wood of the pole and cross poles, I quickly drew out power lines. Most look fairly straight but as often happens in reality one dips in an arc. 3 lines of navy thread over each power line was enough so it is seen, but from a distance fades into the quilt - like power lines seem to disappear in the air from far away.
 |
| Thread sketching power lines |
 |
| This is called a forced break! |
Using fusible I sketched out several bird silhouettes. After ironing them down I wanted to quilt them in a pebble design but was reminded that quilting with invisible thread means you can't really see whats happening! So, just did a scribble stitch.
 |
| These were so cute I almost wanted to keep them on my design wall! |
At this point I realized there was no way to square the wallhanging right then. The thread sketching of the pole drew the fabric up too much - I forgot to add stabilizer to the back! So I researched
blocking. Something I had never done, but read about. That was an adventure - lets just say keeping the dog off the rug just because you have a tightly pinned quilt on it is a challenge!
Even after the blocking, which was actually very successful on most of the wallhanging, I still had a fugly part. The 1/4 inch blue border was obviously out of whack in one section. What to do... So, I cheated. I made a couple of bigger bird silhouettes and used them to cover the border snafu and a little fabric wrinkle I didn't like. The additional birds and large sizes gives the wallhanging even more movement and artistic perspective. One of those things where the bad can be made very good indeed.
 |
| The result - waiting on a wooden dowel to hang it |
On the whole, this is NOT a project I would have undertaken on my own - and that would have been a shame. The colors are not my favorite and I still don't much like florals. Yet this composition on the whole works very well. I am very happy with the birds and how they look and the story this wallhanging tells the viewer. As part of my journey I have gotten more compliments on this wallhanging than anything I have done yet - despite feeling like other pieces I have done are much better. More importantly, I learned SO much from this experience. Take part in challenges - they are called challenges for a reason!
 |
"Online Access"
Entry in Chewelah, WA May Quilt Show for Seasons in Stitches Challenge
35.5" x 25" |


Comments
Post a Comment
Thank you for visiting! I love to hear from you, please share your thoughts!